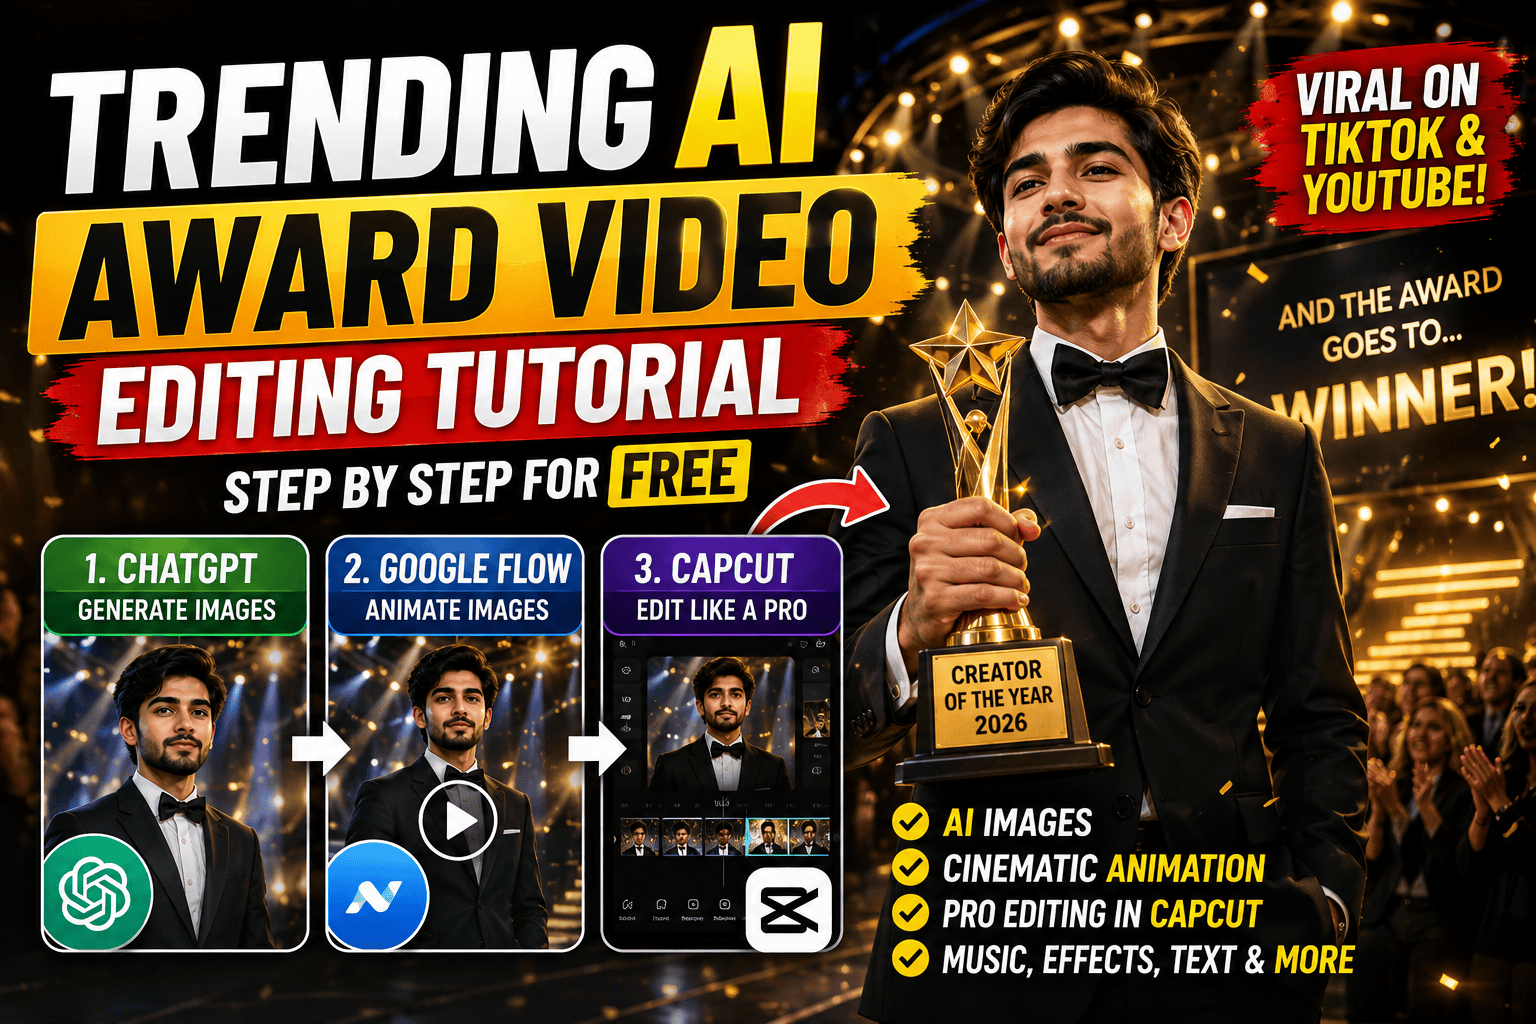
AI video creation has become one of the easiest ways for creators to make eye-catching content without using a professional camera or spending hours inside complicated editing software. One of the formats currently getting attention on social media is the AI award video, where a normal photo is transformed into a cinematic award ceremony scene.
The interesting part is that you can create the complete concept using a combination of AI tools. In this tutorial, we will use ChatGPT to create the images, Google Flow to animate those images, and CapCut to complete the editing.
You can use this workflow for TikTok, YouTube Shorts, Instagram Reels, Facebook Reels, or other short-video platforms.
The process is beginner-friendly, but the final result can look surprisingly professional if you pay attention to the prompts, camera movement, music, and timing.
What Is a Trending AI Award Video?
An AI award video is a short video designed to look like a real award ceremony or achievement announcement.
Imagine a person standing on a luxurious stage while golden lights illuminate the room. A presenter walks toward them carrying a trophy. The audience applauds while cameras flash. The person’s name appears on a giant LED screen, followed by an award title.
The entire scene can be generated without actually filming an award ceremony.
AI creates the visual environment, animates the characters, and helps turn still images into moving scenes.
The final editing is then completed in CapCut.
This type of video works particularly well because it creates curiosity. People immediately want to know who won the award, what the award is, and what happens next.
Tools You Need
For this tutorial, you mainly need three tools:
1. ChatGPT – Generate the required images and develop prompts.
2. Google Flow – Turn the generated images into moving cinematic clips.
3. CapCut – Combine the clips, add music, effects, captions, transitions, and export the final video.
ChatGPT currently supports creating and editing images from prompts, including choosing an aspect ratio, so it can be used as the first stage of this workflow.
Google Flow is Google’s AI filmmaking tool built around its generative models, and its current workflow allows creators to generate, edit, and animate visual assets.
CapCut then provides the editing tools needed to assemble the finished video, including text, effects, transitions, audio, captions, and export controls.
Step 1: Decide What Your Award Video Will Be About
Before opening ChatGPT, decide on your story.
Don’t start by generating random images. A small amount of planning will make the final video much better.
For example, you could make:
- Creator of the Year Award
- Best Gaming Creator Award
- Best Tech Creator Award
- Best TikTok Creator Award
- Best YouTuber Award
- AI Creator of the Year
- Achievement Award
- Influencer of the Year
- Best Student Award
- Fictional Celebrity Award
You can also create a funny or completely fictional award.
For example:
“The Best Tech Creator Award goes to:Your Name”
Once you decide the award, think about the sequence.
A simple video could have:
Scene 1: The award ceremony stage.
Scene 2: The presenter announces the award.
Scene 3: The winner walks toward the stage.
Scene 4: The winner receives the trophy.
Scene 5: The winner holds the award while the audience applauds.
You don’t need 20 scenes. A few strong shots can be enough for a short video.
Step 2: Prepare Your Main Photo
Now choose the person who will appear in the award video.
Use a clear image with good lighting and a visible face.
A high-quality source image generally gives you a better starting point for AI image generation and animation.
Avoid using a very blurry photograph or one where the face is heavily covered.
If you want the AI-generated character to resemble a particular person, use a suitable reference image and clearly describe that the person’s identity and appearance should remain consistent.
You can also ask ChatGPT to improve or transform the image before creating the award scene. ChatGPT supports editing uploaded or generated images through instructions.
Step 3: Use ChatGPT to Create the Award Image
Now comes the most important image-generation stage.
Open ChatGPT and upload your reference image if you want the award scene to feature a particular person.
Then ask it to create a realistic award ceremony image.
For example:
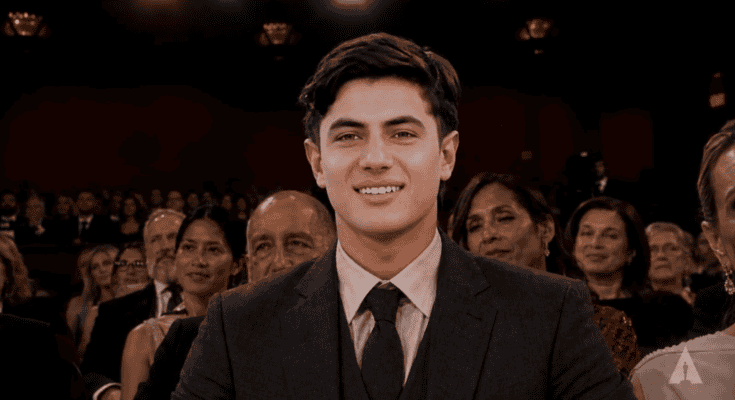
Image Prompt:
1 st pic me jo ladka hai usko remove kar ke mujhe add kar do yani ki 2secound wale ladke ko or hai
face change na ho 2secound wale ladke ka ok
or ha pose and reaction sab 1st bale pic ki trha rhe or bs, no smile.
secound bale ladke ka 100% same face rhe ok
video prompt
Is ladke ko bench par se uthta hua dikhao aur bilkul bhi smile na kare
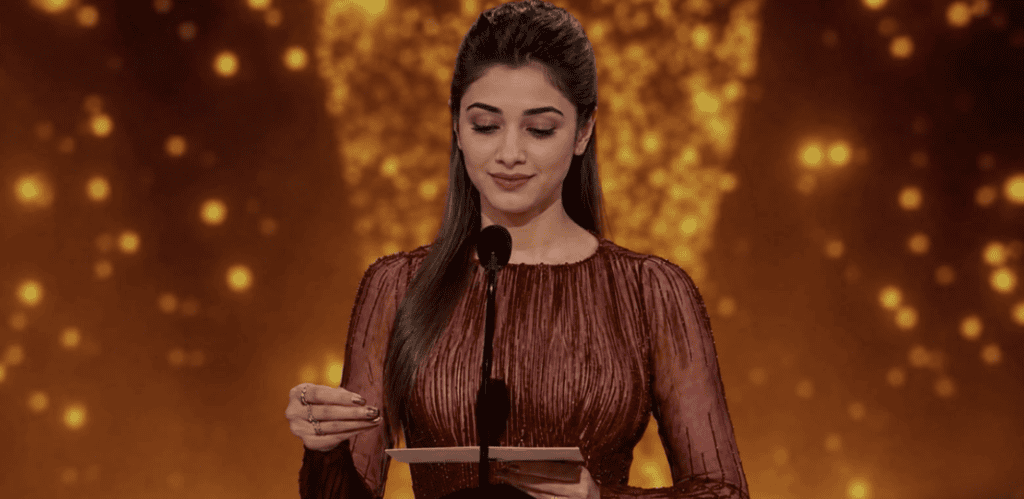
video pormpt
A cinematic awards stage scene with the same original woman’s face preserved exactly (no face change, no distortion). She stands at a microphone holding a card, wearing a red elegant gown, with warm golden bokeh lights in the background.
She gently looks down at the card, then raises her eyes toward the audience. Her lips move naturally in sync as she says:
“The Best Video Editor award goes to… Your Name.”
She pauses briefly before saying “Your Name” for dramatic effect.
Keep the face identity exactly the same, no morphing, no AI face replacement. Only subtle lip movement and natural blinking.
Ultra realistic, 4K, cinematic lighting, soft shadows, smooth motion, shallow depth of field.
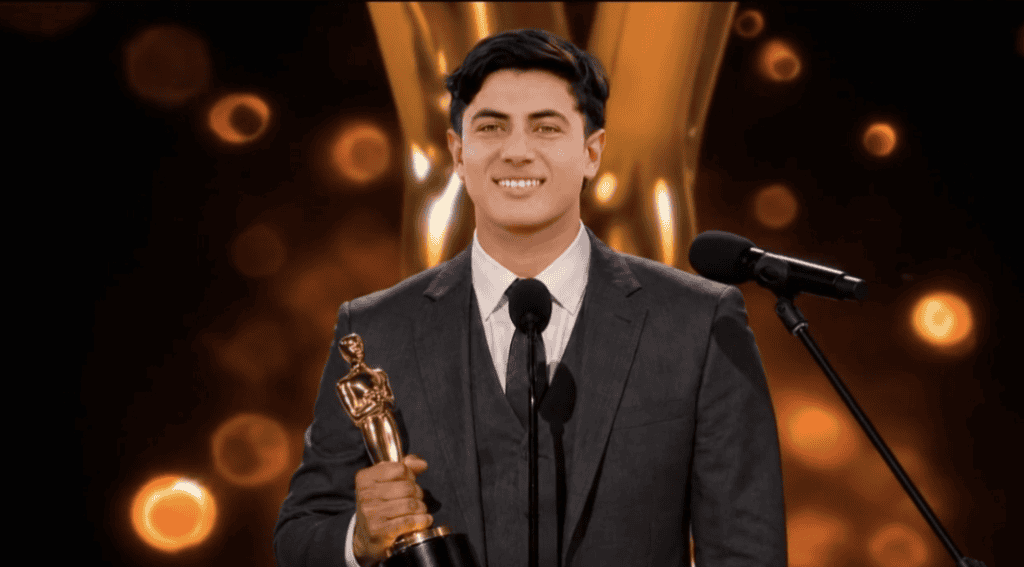
Prompt:
image prompt:
1 st pic me jo ladka hai usko remove kar ke mujhe add kar do yani ki 2secound wale ladke ko or hai
face change na ho 2secound wale ladke ka ok
or ha pose and reaction sab 1st wale pic ki trha rhe or bs
second wale ladke ka 100% same face rhe ok
Video Pompt:
es ladke ko esa dikho jaise ki ye ladka award ko hold kiye huye hai or smile nhi kar rha hai.
Remember keep his face 100% same as in the refrence picture.
The important part is to describe everything that should appear in the scene.
Don’t simply write:
Give the AI enough information to understand the environment.
Step 4: Create Additional Images
One image can create one interesting clip, but multiple images give you much more control.
Create several different shots.
For example:
Image 1 – Stage
A wide shot showing the luxurious award ceremony hall.
Image 2 – Presenter
A presenter standing behind a microphone holding an award card.
Image 3 – Winner
The winner standing under a spotlight.
Image 4 – Trophy
A close-up of a golden trophy.
Image 5 – Final Shot
The winner holding the trophy while the audience applauds.
Try to maintain the same visual style across every image.
If your winner is wearing a black tuxedo in the first image, don’t randomly change him into a casual shirt in the next one.
Step 5: Keep the Character Consistent
This is one of the most important tricks for AI videos.
AI can sometimes change a person’s appearance between generations.
To reduce this problem, repeat important character details in your prompts.
For example:
Then describe the new scene.
You can also use reference images whenever the platform supports them.
The objective is to make every scene look like it belongs to the same award ceremony.
Step 6: Open Google Flow
Once you have your images, move to Google Flow.
Flow is designed specifically around AI filmmaking and can be used to create cinematic clips from visual ideas. Google’s current Flow updates also describe workflows for turning generated images into video and combining visual references into cohesive scenes.
Upload your first image and choose the appropriate image-to-video workflow available in your account.
The goal here is not to completely change the image.
Instead, tell Flow how the scene should move.
Step 7: Write a Cinematic Animation Prompt
Your animation prompt should explain four important things:
Subject movement + environment + camera movement + atmosphere
For example:
Notice that the prompt doesn’t ask for 15 different movements.
Simple movement usually makes the shot easier to control.
Step 8: Animate the Other Scenes
Repeat the same process for your other images.
For the presenter:
For the winner:
For the trophy:
Step 9: Keep the Clips Short
Don’t make the video unnecessarily long.
For a short-form award video, several short clips can work better than one long AI-generated scene.
For example:
Clip 1: 4 seconds
Clip 2: 5 seconds
Clip 3: 5 seconds
Clip 4: 4 seconds
Clip 5: 5 seconds
You can then combine these clips in CapCut.
Short clips also make it easier to remove an individual scene if the AI produces an unwanted frame.
Step 10: Check Every AI Clip Carefully
Before taking your videos into CapCut, watch each generated clip.
Look for:
- Face changes
- Strange hands
- Unnatural walking
- Flickering objects
- Distorted trophies
- Changing clothes
- Background glitches
- Strange audience movement
- Unnatural camera movement
Don’t use a clip simply because it was generated successfully.
If something looks wrong, regenerate it.
A few extra generations can make a major difference to the final video.
Step 11: Start a New Project in CapCut
Now move to CapCut.
Create a new project and import all your Google Flow clips.
For TikTok, Reels, Shorts, and similar vertical content, set your project to 9:16.
CapCut supports different aspect ratios and export settings for social platforms. Its current guidance specifically recommends 9:16 for TikTok and 16:9 for YouTube landscape videos.
Arrange your clips according to the story.
A simple timeline could look like:
0:00–0:04 — Award stage
0:04–0:08 — Presenter
0:08–0:13 — Winner walking
0:13–0:18 — Trophy presentation
0:18–0:23 — Winner holding trophy
0:23–0:27 — Final award shot
Step 12: Add the Main Award Text
Now make the video feel like an actual award announcement.
Add a large title such as:
THE BEST CREATOR AWARD
Then reveal:
GOES TO…
And finally:
Your Name
You can use a dramatic text animation when the winner’s name appears.
Don’t fill the entire screen with text.
The main visual should remain the focus.
Step 13: Add Cinematic Effects
The next step is making the raw AI clips feel more like a finished edit.
You can use subtle:
- Zoom effects
- Light leaks
- Motion blur
- Camera flashes
- Glow
- Particles
- Slow motion
- Film-style overlays
CapCut currently provides effects, transitions, filters, text tools, audio tools, and other editing resources.
The key word here is subtle.
If you add an effect to every second of the video, the final result can become distracting.
Step 14: Add Award-Style Music
Music can completely change the atmosphere.
For this type of video, choose something dramatic and inspirational.
Start with a quiet buildup.
When the presenter announces the winner, increase the intensity.
When the trophy appears, use the strongest musical moment.
Then finish with a satisfying ending.
Always make sure you have permission to use the music if you intend to publish or monetize the video.
Step 15: Add Sound Effects
Now synchronize small sound effects with important moments.
For example:
Title appears → Whoosh
Winner’s name appears → Impact
Camera flash → Camera shutter
Trophy appears → Cinematic hit
Audience scene → Applause
CapCut provides audio and sound-effect tools that can be used to build this type of layered soundtrack.
Don’t make every sound extremely loud.
The sound effects should support the music and visuals rather than overpower them.
Step 16: Add a Voice Announcement
If you want the video to feel like a real ceremony, add a short voice announcement.
For example:
“And the Best AI Creator Award goes to…”
Pause for a moment.
Then:
“Your Name!”
That short pause can make the reveal much more dramatic.
You can use your own recorded voice or an appropriate text-to-speech tool.
Keep the voice clear and make sure the music doesn’t cover it.
Step 17: Add Captions
If your video contains spoken words, captions can make it easier for viewers to follow the announcement.
CapCut provides automatic caption tools that can transcribe speech and allow you to adjust the text, style, and timing.
After generating automatic captions, check them manually.
AI transcription can occasionally misunderstand names or unusual words.
This is especially important when the winner’s name is displayed.
Step 18: Make the First Three Seconds Interesting
The opening can determine whether someone keeps watching or scrolls away.
Don’t begin with a boring blank screen.
Start with the most impressive visual.
For example, immediately show the golden award stage and add:
“WAIT FOR THE WINNER…”
Then quickly cut to the presenter.
You could also begin with:
“THE BIGGEST AI CREATOR AWARD OF 2026…”
The objective is to create curiosity without misleading the viewer.
Step 19: Add a Final Reveal
Your final scene should feel like the payoff.
Show the winner holding the trophy.
Add the person’s name.
Then add the award title.
For example:
wrost editor
BEST TECH CREATOR
2026
A slow zoom toward the winner while the audience applauds can create a strong ending.
Step 20: Export the Video
Watch the complete project before exporting.
Check:
- Audio volume
- Text spelling
- Caption timing
- Face consistency
- Transitions
- Music timing
- Video quality
- Beginning and ending
For vertical social media videos, 1080 × 1920 is a practical output size.
CapCut provides export controls for resolution, frame rate, format, and other settings, although the exact options can depend on your device and platform.
Avoid repeatedly exporting and re-importing the same video because repeated compression can reduce quality.
Step 21: Write a Good Caption
Once the video is finished, don’t forget the post caption.
Instead of writing:
“AI award video.”
Try something that creates curiosity:
“What if your next achievement looked like this? 🏆🤯”
Or:
“Imagine receiving this award in 2026… 🏆”
If the ceremony is fictional or AI-generated, make that clear when appropriate rather than presenting it as a real event.
Step 22: Use Relevant Hashtags
Don’t fill your post with dozens of unrelated hashtags.
Use hashtags that actually describe the video.
For example:
#AIVideo
#AIEditing
#AIArt
#CapCut
#GoogleFlow
#AICreator
#VideoEditing
The best combination can change depending on the platform and audience, so test different combinations rather than assuming one set will always work.
Final Tips for Better AI Award Videos
The tools are important, but your creative direction matters even more.
Keep your character consistent.
Use realistic movements.
Don’t overload the video with transitions.
Choose music that matches the mood.
Make the first few seconds interesting.
Use short clips instead of unnecessarily long scenes.
Most importantly, review every AI-generated clip before publishing it.
AI can sometimes produce visual errors that aren’t obvious until you watch the video carefully.
Also remember that viral is never guaranteed. A good-looking AI video can perform poorly, while a simple video with a strong idea and excellent timing can perform extremely well.
The best approach is to create different versions and test different hooks, titles, music, and openings.
Complete AI Award Video Workflow
You can remember the entire process with this simple formula:
IDEA → CHATGPT → IMAGE → GOOGLE FLOW → ANIMATION → CAPCUT → MUSIC → EFFECTS → TEXT → CAPTIONS → EXPORT
ChatGPT gives you the visual foundation.
Google Flow turns the still images into moving scenes.
CapCut turns those scenes into a complete social media video.
Once you understand this workflow, you aren’t limited to award videos. You can use the same process to create cinematic stories, achievement videos, fictional ceremonies, advertisements, motivational videos, character scenes, and many other AI-generated videos.
Conclusion
Creating a trending AI award video doesn’t require a professional camera crew or an expensive production studio. With the right prompts and a simple workflow, you can create the images in ChatGPT, animate them with Google Flow, and complete the final edit in CapCut.
The most important part is not simply generating an image or pressing an AI video button. You need to think about the story, camera movement, character consistency, music, text, sound effects, and timing.
Start with a simple idea.
Create a strong award image in ChatGPT.
Turn it into a short cinematic clip with Google Flow.
Then bring everything into CapCut and add the finishing touches.
With practice, you can make the process faster and produce better results with every project.
ChatGPT creates the scene. Google Flow brings it to life. CapCut turns it into a finished video.